Monday, 25 June 2012

Open your eyes and look at the day, You'll see things in a different way.


I figure its only a matter of time before I win lotto - sure the odds of me flying solo to the moon and back in a Chanel couture spacesuit might be just slightly more favourable, but I need that little glimmer of hope that the 1 in 100 million chance provides in distracting me from the current state of my working life!  We are currently in the process of commissioning a new stage of alumina production at our refinery which is both exciting, demanding and stressfull all roled up into one super cramped shoulder muscle.  Chocolate consumption in the Capricorn region has increased exponentially in response.

Sunday, 3 June 2012

Now here I go again, I see the crystal visions...or not!


Disaster struck last week when my computer video card decided to lay down on the job and die a noisy but non visual death.  I am of course blaming the cats for this - a couple of days of slightly cold weather and voompa, there goes the winter coat that they shed everywhere and that naturally finds its way into the computer and kaput...there goes the video card.

However, you can still sew without a computer and this week, in fact the month of June, is all about the birthdays...my nieces that is.  I have a little niece Penny turning 3 in the middle of June and my little niece and gorgeous muse Audrey turns 2 at the end of June.   So naturally they are going to get their very own "Aunty Pammysarry Couture Collection" (feel free to interchange the word Couture with Rustically Homemade)

Thursday, 17 May 2012

"Think it will work? It'll take a miracle" Miracle Max not available for Simplicity 2892.


My sewing journey is going on 4 months old and I can feel my sewing skills toolkit get satisfyingly bigger as each project is completed....turn the machine on - tick, sew a straight seam - tick, unpick said straight steam that really wasn't straight - tick, learn to read a pattern - tick, sew a zipper in - tick, learn to use bias binding - tick. 

A lot of the skills I've picked up is due to the wonderful community of sewers that are out in all corners of the globe and who are willing to share.  But this week it wasn't a sewing skill I learnt but more a philosophical set of lessons.....something I can imagine Mr Miagi saying to Daniel-San if it was the Janome Kid, or Yoda to Luke if it was Sew Wars......
  • Know your body shape and know what style and colours are most flattering for you before you commit to a pattern.  Don't get sucked into the pattern cover or think I could make it work if I just change this - there are thousands of patterns out there and guaranteed there is a better pattern for you.
  • That being said if you embark on a project - don't give up and throw it in the bin.  There are always options for a garment even if it means unpicking it and setting the fabric aside for another project.
  • Mums are the greatest!!  Don't go it alone - if you get stuck ask your Mum, friends, random stranger in the street for ideas.
So I think you are getting the picture about this weeks project.  It was Simplicity 2892 and it just didn't work for me.  The back story to this is I have this gorgeous piece of charmeuse fabric that I want to make into a top - so I am trialing different top patterns to see which one wins the grand prize of being made up in the special shiny fabric.  Simplicity 2892 is the first one I tried and I decided on View C because I liked the idea of a defined waistband. 

Admittedly there were many flashing warning lights going off with this pattern.  The very round neckline, the lack of sleeves and the blousiness (aka degree-of-pregnancy effect) and that was just from the picture on the front.   Did I pay attention to any of this.....obviously not.  Instead I focused on the glowing reviews at Patternreview.com.  Only a couple of negative comments about the length of the top which I figured was no biggie for someone as shortwaisted as me.

Construction started well  I used a modifed back pattern from the top I made using Simplicity 3750 which does a crude 'WBA' (weird back adjustment).  The pleats were wrangled into place with confidence.  Binding the armholes was a cinch and while the neck facing does sit a little funny (most likely a slight misalignment from the pleating) it wasn't something a nice hot iron couldn't tame into submission.
Neck facing - aka the skate ramp.

The problem came with the band.  I made an assumption based on the line drawing of the pattern that the band sat below the waist possibly just above the hips.  I shaped my band accordingly and even changed the straight edge to a sloped edge to compensate for my pear shape.  On trying the final product on I realised my error from the amount of skin being flashed by the side slit above the band.  It dawned on me then that the top is meant to really blouse over the band so that you don't see any skin through the side slit and most of the band is covered up.  Which means the band has to sit on the waist.   Which means unless I want to go all Kath and Kim and bare my middle aged midriff the only way to wear this top is with a high waisted pant/skirt.  Also, as I had sized the band for my wider hips it was now too large to sit on the waist.....gah.
When you compare both bodice and band patterns it is blatently obvious where the band has to sit..doh!
Where band is meant to sit...I wore it with a dress...enough said.

Back to the sewing machine....take 2.  I am not working the high waisted look so I shortened the slit on the side so less skin would show when I wore the top.  The end result I think photographed well but it was uncomfortable to wear and wouldn't sit in place.  Everytime I sat down the band would just ride up my back.  I figured out this was because the band was trying to sit in no-mans land between the waist and the hips....it never was going to work like that.


Forcing band to sit just below the waist...looks OK...but high risk of skin exposure from riding up
Ready to consign it to the bin I had an online video chat with my Mum on Mothers Day.  Showing her the top she made a suggestion to remove the band completley and come up with an alternative finish to the bottom of the top.  Long story slightly shorter - I ended up making a casing for a tie and added some additional fabric below to make it sit comfortably at hip height.  Its not perfect but it is certainly wearable.
Adjustable tie means I can change where the top sits to increase or decrease the blousiness of it.


BUT...that being said, round necklines do not suit me and sleeveless does not suit me.  And while I briefly thought "maybe I could just make the neckline more angular and add sleeves from another pattern" I quickly realised thats a lot of effort when there are better patterns just crying out for a short, pear shaped, shortwaisted, sway backed, small busted, narrow shouldered, square faced person like myself to just give them a go!  So I will not be visiting this pattern again any time soon.

And now to throw up the white flag for help - seeking advice from fellow sewers.  Out of this weeks dramas I have 3 questions.
  • Does anyone have a favourite go-to top pattern that they use that would be suitable for a pear shaped person and ideally a V-neck or boat neck style?
  • Do you have a recommended book/website for making pattern adjustments particularly around the shoulders?
  • Is there a trick to make a tie casing?  I admit I butchered this one up and no you won't be seeing any photos of the inside of this top!

So in summary
Pattern:             Simplicity 2892
Fabric:              A lisette cotton from spotlight - really light
                         I used leftover red cotton fabric for the tie/band
Instructions:     Actually really good by Simplicity except I think there could have been more detail
                         on sizing the band (maybe they could have put a waistline line on the band so its
                          obvious where it would sit)
Modifications:  I shortended the top slit at the back considerably.  I didn't need it that long and it
                         looked funny.
                         I replaced the band with a constrast casing and fabric tie at the side and additional
                         main fabric for the bottom hem.
                         I used flat elastic rather than cord elastic because my needle wouldn't go
                        through the cord elastic.
Total Cost:      Cotton was fairly cheap from spotlight and I used under a meter so would guess all
                        up it cost me $10
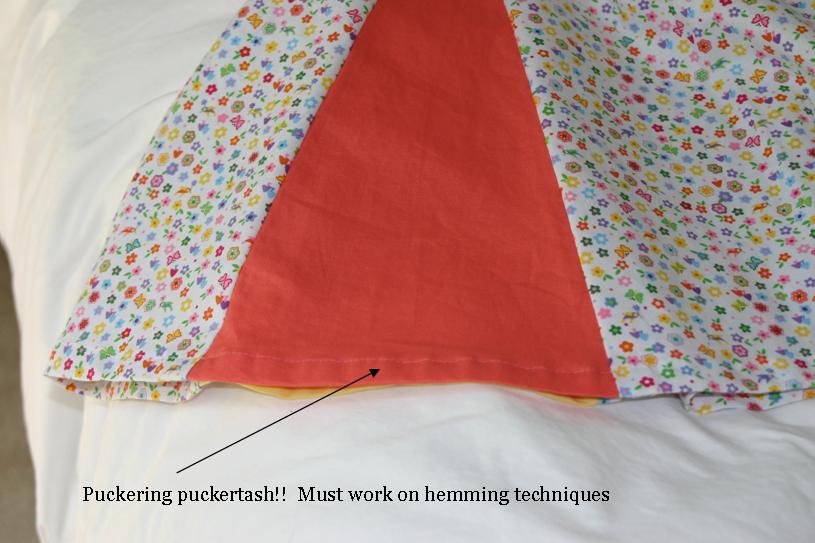
Happy Dance on Completion:   No....lets just leave it at that.


Title Reference:  The Princess Bride, by: William Goldman

Monday, 7 May 2012

If I could turn the page, In time then I'd rearrange....the pattern markings of NewLook 6114

Another long weekend in sunny Queensland.  Labour day public holiday weekend for us, and in respect for those who have campaigned for better workers rights I downed my sewing tools, unplugged the sewing machine, closed the fabric stash cupboard (then reclosed it after it burst open under the strain) and sat back on the couch with a good book in hand.......until I realised that sewing is a hobby for me.....it is not a job....so I needed to get back to it and do a solid 9 hr stint with 1/2 hr allowed for lunch.

So now the challenge was, what was my sewing project going to beeeee this weekend!?  (warning: inappropriate and slightly unfunny bee references interspersed through this blog, in fact you may as well give in and read this blog entry with "flight of the bumblebees" playing in the background) 

It all started with a piece of fabric.  My Mum had found this lovely cotton print down in Brisbane and thought it would be perfect for my gorgeous niece/her gorgeous granddaughter.  Little Auds loves bees and I thought I could make her another cute outfit out of it.

Loki modelling the fabric...working his blue steel look!

Tuesday, 1 May 2012

Hold On.....to my Simplicity 2205 Bag

Simplicity 2205 - bag with cute pleating details on front and back

aahhh! A week off after that challenging Butterick 4443 creation, catching up with my sister and her beautiful family down in BrisVegas and my sewing mojo has been reset and ready to go again.

Friday, 20 April 2012

I'm tingling right from my head to my toes....(or is that just a muscle spasm). The epic journey that was Butterick 4443

Through dangers untold and hardships unnumbered I have fought my way to the end of the dress.....or was that the Goblin City........hmmm leaving my Labyrinth alternate reality behind (though I distinctly remember chanting 'you have no power over me' multiple times to the cursed invisible zipper), let me share with you the saga that was the making of Butterick 4443 aka the semi fitted, partially lined, slightly flared skirt, princess seam dress aka The Dress.

Ta Da....Butterick 4443 

Monday, 9 April 2012

Its a long way down the holiday road.....Easter dress for Audrey

Hope everyone had a lovely easter long weekend.  The one weekend a year where chocolate calories don't count....Was a lovely de-stressing weekend for me starting off with a beautiful swim under clear skies down at Barney Point beach (as usual the beach was overcrowded with just one other family down there enjoying the high tide! its almost my own private swimming beach).  Then had to brave the sales up in Rockhampton with spotlight having 40% of all fabrics.....droool! And of course spent all of yesterday making the, as promised, dress for my gorgeous niece Audrey.  NewLook 6974 - the goddess dress - and here is the end result:

 not having children of my own, Milly kindly volunteered to model the end product for me....

As you can see the dress has a pretty decent wingspan so Auds should be able to get some good twirling action out of this dress.  I did view B of the dress in size 1 which has wide gathered shoulder straps and 4 goddess (aka godets) panels, zipper at the back plus a lining.  I naturally ditched the lining - this was going to be a day dress and thought a lining would be too fussy for a toddler. 

Of course it was hard not to take inspiration from the pattern cover and the suggested fabric combination of leopard print and bright pint.....(seriously? for a toddler) but I resisted the temptation and went with a Michael Miller cotton print Lil Princess.  The goddess panels took a little more thought - I could feel the rust in the creativity cog as it attempted to fire up - and then I cracked under the pressure and simply went with some solid colours.  To try and take it to the next level I decided I wanted the colours mixed into the dress belt ties and in the shoulder straps.

The shoulder strap pattern piece took a bit of rejigging to get the colours mixed in as  I had to break the one rectangle pattern piece into 4 pieces.  Was excited to be able to pull out the calculator and use those engineering skills to figure out the width of all four pattern pieces so that I would end up with even width bands.


Construction was relatively simple, if not for the multiple mistakes I made along the way.  Me and the unpicker (who I hereby name Ripley....after my favourite movie heroine!) got very well aquainted in the making of this dress.   A couple of construction issues I discovered a long the way
  • I couldn't get the notches to match between the dress panels and godets in the pattern piecess.  Not sure if this is just limited to size 1 but it was anoying as it made me hesitate as I looked at my fabric pieces, looked at the pattern, looked at my fabric pieces then had some chocolate.....In the end I matched the tops and bottoms of each piece and that worked fine.
  • The gathered shoulder strap is very, very, very frustrating.  You are trying to gather two layers of fabric with one end containing a seam and the overall width is tincy-tiny.  It did not gather well.  In the end I ripped out the gathering stitches (hello Ripley!), and hand pleated the ends together to get the overall desired width. 
  • My gathers at the front of the dress look demented...seriously....they are the worse looking gathers I've seen.  Again the gathers suffer from lack of width to work with and me not checking the end result.
  • With such a large skirt circumference I had issues with the hem.  It puckered from all that extra fabric being turned up.   In the end its a toddler dress, its not overly noticeable at adult level and I can't imagine Auds playgroup friends bringing it up in conversation (hi Auds...girl, whats up with your dress....that hem is seriously weird....hey who stole my Thomas train......)

Because I ditched the lining, I had to come up with another way to finish the armholes.  I decided to bias bind the armholes as I figured that would be simpler......hmmm....lets just say it was good practice for me.  The end result is OK but think next time I would just draft up two pattern pieces for the yoke side facing to attach to the yoke front and yoke back facings.

Inside of dress, seams zigzag stitched and pinked.  Armhole bias binding
 
So summary
Pattern:                NewLook 6974
Fabric:                 Michale Miller Lil Princess Lil Bitty cotton print
                            100% Homespun cotton in blue, pink, yellow and green for godets
Instructions:        Very easy to follow, I like NewLook patterns for toddlers.  This is a really good
                             beginner dress as it has quite a few panels but the overall construction is very
                            simple.  So really satisfying feeling at the end.
Size:                     Comes in sizes 1/2-4.  I did a size 1 for a 1.5 yr old fairly normal sized toddler.  I
                             think it is going to run a little big in length for Auds and I feel as though I want
                             to cut at least 2 inches off the length of the dress.  Am visiting in two weeks so will
                             check the fit when I go down.
Modifications:     No lining, bias binding on armholes.   Slight tweaks to shoulder pieces and dress
                             ties.

Coming Soon...to a Sewing Room near you
So with Audreys dress out the way its time to focus back on me and the next project is big...really big...cue scary music  (for the complete experience click on link to activate scary music from youtube).  Is it playing?  Ahh stupid youtube ads....OK wait 3 seconds and skip it....Is it playing?  Good, now read slowly like the cinema voiceover guy.......

Coming soon to Gladstone, starting on Friday the 13th and continuing through the entire weekend will be the scariest thing I have ever tackled.  It will test my beginnerish sewing skills to the limit.   There will be tears, there will likely be a cramp in the back of my shoulder that I just can't reach and there will definitely be copious chocolate consumption, but how will it end......?  Will Ripley make a cameo appearance or have a starring role?  So what is this challenge that befalls me........I will be attempting to make Butterick 4443.  My first ever Butterick pattern and it is a fitted, A-Line dress, with lining, princess seams, blind hem, zipper and......its........not........in........quilting cotton!! Its going to be in linen.  So stay tuned....things could get interesting......


Title reference:  Holiday Road, by Lindsey Buckingham